問題:只知道一顆樹的 preorder 和 inorder ,要求出樹的架構。
這是個能用 D&C 解決的好問題。在 inorder 之中, root 兩邊分別為左子樹和右子樹;而 preoder 的最左邊的元素就是 root ──故可以利用 root 來分出左子樹和右子樹。每個子樹又是一棵樹,又可以再分割,如此便可求出整棵樹的架構。
能知道分割的關鍵在哪裡,應該就不難理解了。會有唯一解。
至於只有 preorder 和 postorder 的話,是做不出答案的。正是因為這兩個 order 當中,找不到可以分割的地點。
那麼 levelorder 呢?大家就自己想想吧。( order 的部分可以寫成一篇長長的文章吧。我孤陋寡聞,實在不想多寫。)
這裡也是列出幾題,相信很多人都有看過。
UVa 10701 536 548 10410
2009年4月2日 星期四
Tree Reconstruction
2009年3月29日 星期日
Range Minimum(Maximum) Query, RMQ
從這位強者的網誌轉錄:
http://gozule.blogspot.com/2009/02/range-minimummaximum-query-rmq.html
Input:array A[0, N]
Output: the index of minimum(maximum) value between two given indices.
RMQ的功能是若有一群資料放在array中,在經過preprocessing後,可在O(1)的時間內找出index i~j之間的最小(大)的元素。目前preprocessing最快是O(n),也就是只需要O(n)的時間就可以處理完成。
以下介紹O(nlog(n))的preprocessing方法,O(n)的方法是由此法去改進,所以先了解此法相當重要且因程式碼容易撰寫,所以也相當適合在ACM中使用。
假設array的長度2的n次方。
建立一個大小為n x log(n)的矩陣M,用來存放RMQ的結果,其中M[i][j]是指以index i開頭,長度為2^j次方內最小元素的index。
使用dynamic programming方法建立M,需O(nlogn) time。
//time complexity: O(nlogn)
void preprocess(int M[MAXN][LOGMAXN], int A[MAXN], int N)
{
int i, j;
//initialize M for the intervals with length 1
for (i = 0; i < N; i++)
M[i][0] = i;
//compute values from smaller to bigger intervals
for (j = 1; 1 << j <= N; j++)
for (i = 0; i + (1 << j) - 1 < N; i++)
if (A[M[i][j - 1]] < A[M[i + (1 << (j - 1))][j - 1]])
M[i][j] = M[i][j - 1];
else
M[i][j] = M[i + (1 << (j - 1))][j - 1];
}
//output: the index of the minimum value between index i and j
int RMQ(int i, int j, int M[MAXN][LOGMAXN], int A[MAXN], int N)
{
if(i<0 || i>=N || j<0 || j>=N)
return -1;
if(i > j) //swap i, j
i ^= j, j ^= i, i ^= j;
int k = (int)(log(j-i)/log(2.0)),
rem = j-(1<
}
2009年2月26日 星期四
Vim 訣竅:使用view ports
ref from http://blog.sina.com.tw/jiing/article.php?pbgid=872&entryid=583193
Vim tips: Using viewports
Vim 訣竅:使用view ports
By Joe 'Zonker' Brockmeier on May 10, 2006 (8:00:00 AM)
試譯者:jiing
A lot of folks use Vim, but many exploit only a small percentage of the editor's features. Sure, you might know how to do the basics in Vim, but what about using more advanced features such as folding, split windows, and marks? With a little practice, you can really boost your productivity with Vim.
In this and future articles, I'm going to cover Vim features that you may not be familiar with if you're a casual Vim user. If you're confident using Vim to edit configuration files or make short edits in text files, but maybe not too comfortable with undertaking major writing or coding in Vim, then these articles should be for you.
有許多人使用vim,不過許多人只探索了編輯器特性的一丁點。當然了,你可能知道Vim的基本用法,不過關於更進階的特性,例如摺疊(folding)、分割(split)視窗和標示(marks)呢?用一個小小的練習,你可以用Vim真正地提升你的生產力。
在本篇和未來的文章中,我將涵括Vim中你可能不熟悉的特性(如果你是個隨性的Vim使用者)。如果你有信心用Vim來編輯組態設定檔或是使用小小的文字編輯,但可能用Vim來寫程式碼或是進行大量的書寫時不是太舒服的話,那麼這些文章應該是為你而寫的。
Splitting Vim's viewport
分割Vim的視埠(viewport)
A really useful feature in Vim is the ability to split the viewable area between one or more files, or just to split the window to view two bits of the same file more easily. The Vim documentation refers to this as a viewport or window, interchangeably.
在Vim中一個真的很有用的特性是去將一或多個檔案分割成數個可視的區域的能力,或只是分割視窗更容易地看同個檔案中的二個位元(2 bits)。Vim文件中將這個稱作viewport或window,二個詞是可被交換使用的。
You may already be familiar with this feature if you've ever used Vim's help feature by using :help topic or pressing the F1 key. When you enter help, Vim splits the viewport and opens the help documentation in the top viewport, leaving your document open in the bottom viewport.
如果你曾經使用Vim的輔助特性(藉由:help topic 或是按下 F1 鍵),你可能已經熟悉這項特性。當你進入輔助說明(help)時,Vim分割viewport,並且開啟輔助說明文件在上面的viewport,而讓你的文字開啟在底下的viewport。
Vim viewport keybinding quick reference
Vim viewport的鍵盤對應的快速參考
:sp will split the Vim window horizontally. Can be written out entirely as :split .
:sp 將View視窗水平分割。可以完整寫出成:split
:vsp will split the Vim window vertically. Can be written out as :vsplit .
:vsp 會將視窗垂直分割。能被寫成 :vsplit
Ctrl-w Ctrl-w moves between Vim viewports.
Ctrl-w Ctrl-w 會在View的viewports間移動
Ctrl-w j moves one viewport down.
Ctrl-w j 會把一個viewport 往下移
Ctrl-w k moves one viewport up.
Ctrl-w k 會把一個viewport 往上移
Ctrl-w h moves one viewport to the left.
Ctrl-w h 將一個viewport往左移
Ctrl-w l moves one viewport to the right.
Ctrl-w l 將一個viewport往右移
Ctrl-w = tells Vim to resize viewports to be of equal size.
Ctrl-w = 告訴Vim 去將viewports的尺寸變成相同的大小
Ctrl-w - reduce active viewport by one line.
Ctrl-w - 將作用中的viewport 減少一行
Ctrl-w + increase active viewport by one line.
Ctrl-w + 將作用中的viewport 增加一行
Ctrl-w q will close the active window.
Ctrl-w q 會關閉作用中的視窗
Ctrl-w r will rotate windows to the right.
Ctrl-w r 會將視窗轉到右方
Ctrl-w R will rotate windows to the left.
Ctrl-w R 會將視窗轉到左方
If you want to use this feature for something other than viewing Vim's help files, you can split the viewport by using :sp, :split, or Ctrl-w n -- they do the same thing, but just typing :sp will save you a few characters, and it's easier to use with arguments, such as filenames. Rememberthe Ctrl-w part, though, because it will come in handy for most operations with windows.
如果你想要用這個特性來做些除了觀看Vim的輔助檔以外的事,你可以用:sp來分割視埠,:split,或是Ctrl-w n --他們會做同一件事,不過只打:sp會省下幾個打字的功夫,且它也較容易與引數一起使用,例如檔名。雖然只記得Ctrl-w的部份,因為它對於大部份視 窗的操作會。??
The :sp command will divvy up the viewport into two equal viewports for the file that you have open. If you'd like to work on two files simultaneously, no problem -- just follow the command with the filename you'd like to use, like this:
:sp 命令會對於你所開啟的檔案將視埠分割成二個相等大小的視埠。如果你想要同時在二個檔案上工作,沒問題--只要在你要的命令後加上你要用的檔名,像這樣:
:sp filename
That will open filename in the new viewport. You can even add a search string to that to move directly to the first instance of a keyword, like so:
那會在新的視埠開啟檔案。你甚至可以新增一個搜尋字串到命令中,以直接到第一個你搜尋的關鍵字(keyword)處,像這樣:
:sp +/searchstring filename
Easy as falling off a log. What if you don't want to have equal viewports? For example, let's say you want to open a reference file in the top viewport, but want the majority of the viewport available for the file you're actually editing. No problem. Just prepend a number to the sp command, and the new viewport will fill that number of lines:
就像作個紀錄般容易。如果你不想要有同樣大小的視埠呢?例如,讓我們假設你想要開啟一個參考檔案在頂端的視埠,不過想要大部份的視埠用於你真正在編輯的檔案。沒問題!只要在sp命令前加上個數字,新的視埠就會以那個數字的行數來填滿:
:10 sp filename
Now you have a viewport with 10 lines, but what if you've decided that you'd like to give both viewports equal real estate? That's easy enough too. Instead of going into command mode, you can use a normal keybinding to accomplish this. Ctrl-w = tells Vim to assign an equal number of lines to each viewport.
現在你有一個10行的視埠,不過如果你已經決定你想要讓二個視埠有著相同的大小?那也有夠容易的。不用進去命令模式,你可以用一個常用的按鍵對應(keybinding)來做這件事。Ctrl+w = 告訴Vim指派相等行數給每一個視埠。
To move between the viewports while working, use Ctrl-w j to move down, and Ctrl-w k to move up. This should prove easy to remember -- Ctrl-w for "window" commands, and the normal vi movement commands j for down and k for up. You can also cycle between viewports by using Ctrl-w Ctrl-w.
當工作時,要在視埠間移動,用Ctrl-w j來向下移,Ctrl-w k來向上移。這應該證明了它很容易記 -- Ctrl-w 是對於「視窗(window)命令」,而一般的vi移動命令j來向下移動,k來向上移動。你也可以用Ctrl-w Ctrl-w來在視埠間循環地移動。
You can increase or decrease a viewport's size after it's been created. Use Ctrl-w + to increase the active viewport, and Ctrl-w - to decrease its size by one line. If one line at a time isn't sufficient, add a modifier before the + or -. For instance, to add 13 lines, use Ctrl-w 13+.
你可以在視埠被建立後,增加或減少一個視埠的尺寸。使用Ctrl-w + 來增加作用中視埠的尺寸,Ctrl-w -來減少它的尺寸一列。如果一次一列不夠,那麼加一個修飾元(modifier)在+號或-號的前面。例如,要增加13行,使用Ctrl-w 13+。
If horizontal viewports just don't do it for you, Vim also supports splitting viewports vertically. To do this, just use :vsp, or :vsplit if you prefer to spell it out. Movement between vertical viewports is similar to moving between horizontal viewports. Ctrl-w Ctrl-w works, and instead of using the j and k movement keys, use the h and l movement keys to move back and forth between viewports. To move to the viewport to the right, for example, you'd use Ctrl-w l.
如果水平的視埠沒有為你做這件事, Vim也支援垂直地分割視埠。要做這件事,只要用:vsp或如果你偏好將它拚出來,可以用:vsplit。在垂直視埠間移動很像在水平視埠間移動。也可以 用Ctrl-w Ctrl-w,而不是用j或k的移動鍵,用h和l的移動鍵來向後一個和向前一個視埠移動。例如,要將視埠移動到右方,你可以用Ctrl-w l。
It's also worth mentioning that you can open a file in a viewport just to view the file, without opening it to edit. To do this, use the :sview filename command. To do it vertically, use :vert sview filename .
也值得一提的是你可以在一個視埠中開啟一個檔案,只是去觀看檔案,而不用開啟它來編輯。要這麼做,用 :sview filename命令。要以垂直地方式來做,那麼用:vert sview filename。
You can close a window in one of several ways. The easiest is to just use the quit command, :q, or you can use Ctrl-w q. Note that if it's the only window open with a file, Vim will prompt you to save the file if it isn't saved already.
你也可以用數種方法中的一種來關閉視埠。最簡單的方法就是使用quit命令,:q,或者你可以用Ctrl-w q。注意,如果這是唯一開啟檔案的視窗,如果檔案尚未儲存,Vim 會提示你要儲存檔案。
Also, it's possible to rotate the windows, if you decide you'd prefer to have the top window on the bottom or vice versa. To do this, use Ctrl-w r to move windows to the right or down. When you do this, for example, in a Vim session with three horizontal viewports open, the top viewport would go to the middle position, the middle viewport would take the bottom position, and the bottom viewport would rotate to the top. To go in the opposite direction, use Ctrl-w R instead.
同樣地,也可以去旋轉視窗,如果你決定你偏好讓頂端的視窗在底端,反之亦然。要這樣做,用Ctrl-w r來移動視窗到右方或是下方。舉例來說,當你在一個有三個水平視埠開啟的Vim session中這麼做,頂端的視埠會到中央,中央視埠會到底端,而底端的視埠會轉移到頂端。要以向反的方向移動,改用Ctrl-w R。
Vim often offers several different ways to achieve the same things. For instance, as I pointed out, :sp, :split, and Ctrl-w n all create a new viewport. I haven't listed all of the possible commands or keybindings to accomplish all of the tasks here.
Vim 通常提供數種不同的方法來儲存相同的東西。例如,如我指出的,:sp, :split和Ctrl-w n都會建立一個新的視埠。我還沒有列出所有可能的命令或是對應鍵(keybindings)來完成所有在此的工作。
Over the years, I've found Vim's split windows features to be very useful. I often use it to edit a column or article in one viewport, and to read and copy from notes in another viewport.
過了數年之後,我已經發現Vim的split視窗特性是非常有用處的。我通常用它來編輯一行或是在一個視埠中的文章,然後從另一個視埠讀取並複製筆記。
2009年2月11日 星期三
SmartMovie 簡單介紹、影片壓縮、字幕製作
SmartMovie 簡單介紹、影片壓縮、字幕製作
軟體名稱︰SmartMovie
軟體介面︰英文 ( 有中文化 )
軟體官方︰Lonely Cat Games
軟體簡介︰ S60 平台上知名的 AVI 播放器。
優點︰ 支援外掛字幕。(只支援 Sub 格式字幕。) 檔案小不佔用資源
缺點︰ 檔案清單中的中文會變以「?」顯示,建議使用英文檔名。
快速鍵 (播放中)︰ 方向鍵上/下 (以播放方向為準):調節音量
方向鍵左/右 (以播放方向為準):快進快退
OK鍵: 暫停/播放
1鍵:亮度調節(暗)
3鍵:亮度調節(亮)
2鍵:顯示/隱藏搜尋列
4鍵:跳轉到指定時間
5鍵:切換播放方向
6鍵:切換顯示模式 (原始大小/符合畫面)
7鍵:顯示/隱藏字幕
8鍵:顯示/隱藏時間列
9鍵:逐影格播放
0鍵:切換時間列顯示方式 (已播放時間/剩餘播放時間)
左鍵︰回功能表
右鍵︰退出
壓縮 SmartMovie 影片︰
AVI 轉檔時不大建議使用 SmartMovie 官方的轉檔軟體,因為不管用什麼 Code 編碼都會有平滑過頭的現像,如果轉檔影片有內崁字幕時壓縮後字幕會很糢糊。
建議使用︰
WinMEnc( 免費、免安裝、幾乎支援讀取所有影片格式,可輸出為 AVI、MP4 一般移動裝置常用到的格式)
壓縮格式︰
視頻︰DivX_512 K_320X240
為什麼建議使用 DivX Code 呢?
之前曾以 XviD 壓縮一部 600 MB 影片,使用 SmartMovie 播放時影片畫面會破碎。之後又用 DivX 壓縮了一次,結果竟然能正常播放了。
不過話說回來以前我所有影片幾乎都是用 XviD 作壓縮倒也沒遇過類似問題,反正為了不浪費時間壓縮還是建議使用 DivX。
在 Nokia N73 手機上作過多次測試 512K 算是最穩定的輸出值 (以動作片而言),如果壓縮比較靜態的影片想增加畫面品質其實可以再作再高品質設定。
解析度可依照裝置解析度設定,並使用「配合寬度」或「配合高度」來讓影片保持比例,否則畫面將會拉伸展至所選擇的解析度而失去原有比例。
視頻︰MP3_96Kb_22050Hz
移動裝置的擴音器基本上太高品質設定除了增加檔案壓縮後大小,並不會讓你有明顯的高品質聽覺感受,所以上述設定值已經很夠用了 (Nokia N95 內建的高品質錄製,音訊品都沒那麼高了。)。另外 SmartMovie 只支援 MP3 音訊解碼,這裡只能用 MP3 作音訊編碼 。
(如果你要壓縮 MP4 時則必需選擇 AAC,Nokia 內建的 RealPlayer 並不支援 MP3 編碼音訊…離題了)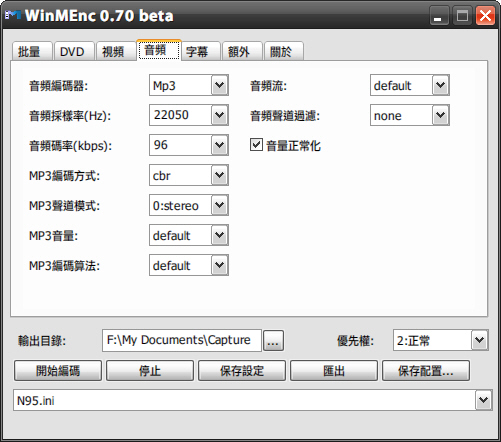
字幕︰
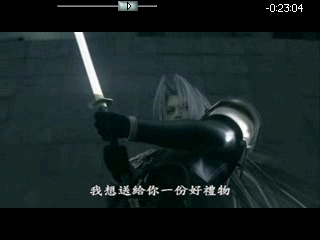
雖然 SmartMovie 支援外掛字幕,不過轉換即麻煩品質又差強人意,所以不如在轉檔時直接將字幕內崁效果還好一些。要崁入字幕其實只要將字幕跟要轉檔的影片在放在同一資料夾下並以相同檔名命名,
例如︰
E:\Video\Final Fantasy VII AC.aviE:\Video\Final Fantasy VII AC.srt
接著在字幕選項中選擇所載入字幕格式,在壓縮過程中 WinMEnc 便會將字幕崁入。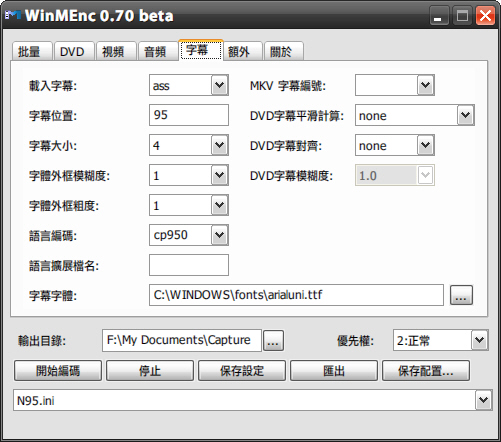
額外︰
說真的這頁面中老是出現一些參數指令,我自己也搞不懂。不過這頁面卻有一個滿好用的功能,就能可以剪裁影片。
只要在「開始時間」和「結束時間」填入時間即可以進行影片剪裁。
開始時間︰00:01:00
在填入的時間之前片段將被剪掉。(範例︰剪掉1分鐘以前片段。)
結束時間︰00:10:00
在填入的時間之後片段將被剪掉。(範例︰剪掉10分鐘以後片段。)
(特別注意的是如果同時在「開始時間」和「結束時間」填入時間,那麼「結束時間」的時間算法是以「開始時間」剪裁後開始算起,而不是以未剪裁前算起。)
建立 SmartMovie 字幕︰
安裝 VobSub2.23,安裝完後後開啟「開始功能 表\VobSub\SubResync」。
SubResync 基本上來是來重新同步字幕的程式,但我們也可以用它來轉換字幕格式。
SubResync 支援的字幕格式相當多,不過為了操作方便建議使用 Srt 格式字幕來進行轉換。
開啟 SubResync 後使用「開啟」鈕來選擇你要轉換的字幕,選定字幕後別一下子開啟,下方選項中還有需作設定的選項,
字元集 ︰ChineseBig5幀/秒︰XX ( 這裡要選擇配合此字幕的影片影格率,未轉檔前影片 )
選擇完成後按下「開啟」鈕,這時會回到 SubResync 不需要作任何設定直接再按下「另存為…」按鈕,
存檔類型選擇為︰Microdvd (*.sub)
接下來可以將影片和字幕移至手機,影片和字幕必需在同一資料夾檔名必需相同。
例如︰
E:\Video\Final Fantasy VII AC.avi
E:\Video\Final Fantasy VII AC.sub
效果預覽︰
外掛字幕︰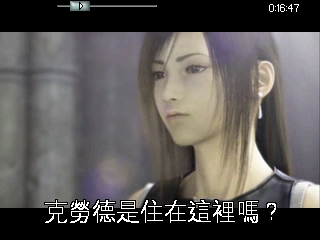
內崁字幕︰
2008年12月24日 星期三
建立自己的.vimrc
在家目錄底下vim .vimrc
個人偏好:
set number
set ts=2
highlight Comment ctermfg=darkcyan
在深層目錄想要修改.vimrc
vim ~/.vimrc
2008年12月19日 星期五
2008年11月26日 星期三
pdf 密碼保全
使用密碼保全文件
http://help.adobe.com/zh_TW/Acrobat/9.0/Standard/WSD012A4E1-51D1-4bcd-BA9F-EF03C6F20BB6.html
新增密碼保全
您可以設定密碼或限制特定功能 (如列印和編輯) 來限制對 PDF 的存取。文件若已被簽署或認證,則無法新增密碼至該文件。可使用兩種密碼類型:
「文件開啟」密碼
針對文件開啟密碼 (也稱為使用者密碼),使用者必須輸入您指定用以開啟 PDF 的密碼。
「權限」密碼
若您僅設定權限密碼 (也稱為主人密碼),則收件者不需密碼即可開啟文件。不過,必須鍵入「權限」密碼才能設定或變更被限制的功能。
若同時使用兩種類型的密碼來保全 PDF,則以任一種密碼都可以開啟該 PDF。不過,只有「權限」密碼能允許使用者變更被限制的功能。由於增加了保全,設定兩種類型的密碼通常比較有利。
所有 Adobe 產品均強制執行權限密碼設定的限制。不過,若協力廠商產品不支援或相應這些設定,則文件收件者可以忽略所設定的某些或所有限制。
重要事項: 如果您忘記密碼,您將無法從 PDF 恢復密碼。請考慮保留沒有密碼保護的文件副本。
請執行下列任一項作業:
若是單一 PDF 或「PDF 文件夾」的元件 PDF ,開啟 PDF,再選擇「進階」>「保全」>「密碼加密」。
若是「PDF 文件夾」,開啟「PDF 文件夾」,再選擇「檔案」>「修改 PDF 文件夾」>「保全文件夾」。在「保全方法」功能表中,選擇「密碼保全」。
若您收到提示,請按一下「是」以變更保全。
選取相容性等級。此選項設定加密等級及密鑰大小。
加密演算法及密鑰大小根據版本而有不同。請確定您的加密等級等於或小於收件者的 Acrobat 或 Reader 版本。
請選取文件元件以進行加密。
若要允許搜尋文件內容,請勿加密元資料。如欲建立保全信封,請使用「僅加密檔案附件」。
選取新增的密碼類型,再將密碼鍵入相應欄位。設定「權限」密碼時,請決定存取等級。
若要允許收件者將 PDF 內容複製至另一份文件,請選取「啟用複製文字、影像和其它內容」。
請按一下「確定」。提示您確認每個密碼時,請於方塊中重新鍵入適當的密碼,再按一下「確定」。
密碼保全選項
您建立 PDF 或套用密碼保護至 PDF 時可以設定以下選項:選項將依照「相容性」設定而有所不同。使用 PDF/X 標準或預置時,保全選項不可用。
「相容性」
設定加密類型,以開啟有密碼保護的文件。「Acrobat 3 和更高版本」選項使用低等級加密 (40-bit RC4),而其他選項使用高等級加密 (128-bit RC4 或 AES)。「Acrobat 6.0 和更高版本」使您可以搜尋元資料。Acrobat 9.0 和更高版本會使用 256-bit 密鑰大小的 AES 加密演算法來加密文件。
使用舊版 Acrobat 的使用者無法開啟相容性設定較高的 PDF 文件。例如,如果您選擇「Acrobat 9 和更高版本」選項,文件即無法在 Acrobat 8.0 或更低版本中開啟。
「加密所有文件內容」
選擇此選項將加密文件和文件元資料。如果選定此選項,搜尋引擎無法存取文件元資料。
「加密除元資料以外的所有文件內容」
選擇此選項將加密文件內容,但仍然允許搜尋引擎存取文件元資料。當您選取 Acrobat 6.0 與更新版本的相容性時,即可使用此選項。
「僅加密檔案附件」
選擇此選項將要求使用者提供密碼才能開啟檔案附件。但使用者無需密碼即可開啟 PDF。針對保全信封,請使用此設定。當您設定 Acrobat 7.0 與更新版本的相容性時,即可使用此選項。
「要求密碼來開啟文件」
選擇此選項要求使用者鍵入您指定的密碼才能開啟文件。如果選定了「僅加密檔案附件」,此選項即不可用。
「文件開啟密碼」
指定使用者開啟 PDF 檔案時必須鍵入的密碼。
備註: 如果您忘記了密碼,您將無法從文件恢復密碼。因此,最好將密碼存放在其它安全的位置,以免您忘記密碼。
「限制編輯和列印文件」
限制存取 PDF 檔案的保全設定。使用者可檢視以 Acrobat 開啟的檔案,但若要變更保全與權限設定,則必須先輸入指定的「權限」密碼。若是以 Illustrator®、Photoshop® 或 InDesign® 開啟檔案,使用者則必須先輸入「權限」密碼。檔案無法以僅供檢視的模式開啟。
「變更權限密碼」
指定變更權限設定時所需的密碼。只有在上一個選項已選定之後,才可用此選項。
「允許列印」
指定使用者列印 PDF 文件時可允許使用的列印等級。
「無」
選擇這個選擇,可以防止使用者列印文件。
「低解析度 (150 dpi)」
允許使用者以不超過 150-dpi 的解析度列印。由於是以位圖影像的形式列印每一頁,因此列印速度可能較慢。只有在「相容性」選項設為「Acrobat 5.0 或更新版本」時,才可使用此選項。
「高解析度」
可讓使用者以任何解析度進行列印,進而將高品質向量輸出導向至 PostScript® 與其他支援進階高品質列印功能的印表機。
「允許變更」
定義允許對此 PDF 文件進行的編輯動作。
「無」
讓使用者無法變更「允許變更」功能表中所列的文件,如填入表單欄位與加入注釋。
「插入、刪除和旋轉頁面」
允許使用者插入、刪除及旋轉頁面,並建立書籤和縮圖。此選項僅適用於高加密層級 (128 位元 RC4 或 AES)。
「填寫表格欄位和簽署存在的簽名欄位」
允許使用者填寫表格和新增數位簽名。此選項並不會允許使用者加入注釋或建立表格欄位。此選項僅適用於高加密層級 (128 位元 RC4 或 AES)。
「注釋、填寫表格欄位和簽署現有的簽名欄位」
允許使用者新增注釋和數位簽名,以及填寫表格。此選項不允許使用者移動頁面物件或建立表格欄位。
「所有,但不包括擷取頁面」
循序使用者編輯文件、建立並填寫表格欄位和增加注釋及數位簽名。
「啟用拷貝文字、影像和其他內容」
可讓使用者選取和拷貝 PDF 內容。
「為視力不佳者啟用螢幕閱讀程式裝置存取文字」
讓視力不佳的使用者可使用螢幕閱讀程式閱讀文件,但不允許使用者複製或擷取內容。此選項僅適用於高加密層級 (128 位元 RC4 或 AES)。
移除密碼保全
若您具備該權限,則可自開啟的 PDF 移除保全。若 PDF 以基於伺服器的保全策略進行保全,僅策略作者或伺服器管理員可變更該 PDF。
於開啟的 PDF 執行下列其中一項作業:
選取「進階」>「保全」>「移除保全」。
在「文件內容」對話方塊的「保全」標籤中,請從「保全方法」功能表選擇「無保全」。
根據文件附加的密碼保全類型,選項會有不同:
若文件僅包含「文件開啟」密碼,請按一下「確定」,可自文件移除該密碼。
若文件包含「權限」密碼,請將它鍵入「輸入密碼」方塊,再按一下「確定」。再按一下「確定」以確認動作。
2008年10月25日 星期六
轉錄自http://linux.wku.edu/~lamonml/algor/sort/quick.html
http://linux.wku.edu/~lamonml/algor/sort/quick.html
void quickSort(int numbers[], int array_size)
{
q_sort(numbers, 0, array_size - 1);
}
void q_sort(int numbers[], int left, int right)
{
int pivot, l_hold, r_hold;
l_hold = left;
r_hold = right;
pivot = numbers[left];
while (left < right)
{
while ((numbers[right] >= pivot) && (left < right))
right--;
if (left != right)
{
numbers[left] = numbers[right];
left++;
}
while ((numbers[left] <= pivot) && (left < right))
left++;
if (left != right)
{
numbers[right] = numbers[left];
right--;
}
}
numbers[left] = pivot;
pivot = left;
left = l_hold;
right = r_hold;
if (left < pivot)
q_sort(numbers, left, pivot-1);
if (right > pivot)
q_sort(numbers, pivot+1, right);
}
2008年10月16日 星期四

2008年10月1日 星期三

2008年6月26日 星期四
printf( ) 的列印格式、控制字元、修飾子
| - 列印格式- | -輸出敘述 |
| %c | -字元 |
| %s | -字串 |
| %d | -十進位整數 |
| %u | -無號十進位整數 |
| %o | -無號八進位整數 |
| %x | -無號十六進位整數,以 0 ~ f 表示 |
| %X | -無號十六進位整數,以 0 ~ F 表示-- |
| %f | -浮點數,小數點型式 |
| %e | -浮點數,指數e型式 |
| %E | -浮點數,指數E型式 |
| %g | -印出 %f 與 %e 較短者 |
| %G | -印出 %F 與 %E 較短者 |
| %p | -指標位址 |
| %% | -印出百分比符號 |
-
| -控制字元-- | -功能 |
| \a | -警告音 |
| \b | -倒退 |
| \f | -換頁 |
| \n | -換行 |
| \r | -歸位 |
| \t | -跳格 |
| \’ | -印出單引號 |
| \” | -印出雙引號 |
| \\ | -反斜線 |
| \/ | -斜線 |
| \d | -八進位 Ascii 碼 |
| \x | -十六進位 Ascii 碼-- |
-
| -修飾子- | -功能 | -範例 |
| - | -向左對齊 | -%-3d |
| + | -將數值的正負號顯示出來 | -%+5d |
| 空白 | -數值為正值時,留一格空白;為負值時,顯示負號 | -% 6f |
| 0 | -將固定欄位長度的數值前空白處填上 0;與 - 修飾子同時使用時,此修飾子無效-- | -%07.2f-- |
| 數字 | -欄位長度,當數值的位數大於所定的欄位長度時,欄位會自動加寬它的長度 | -%9d |
| . | -數值以 %e, %E, %f 型式表示時,決定小數點後所要顯示的位數 | -%4.3f |
| h | -表示 short int 或是 unsigned short int | -%5h |
| l | -表示 long int 或是 unsigned long int | -%lu |
2008年4月17日 星期四
2008年4月11日 星期五
ubuntu的顯示桌面快速鍵
gnome ?
ctrl + alt + d 試試看~~
我記得是 default 是這個,不然也可以重設
(應該是用 /usr/bin/gnome-keybinding-properties )
2008年4月8日 星期二
Some Advice on Writing a Technical Report
Some Advice on Writing a Technical Report
Alan T. ShermanDRAFT: April 27, 1996
The Technical Report (TR) is a common written form through which computer scientist communicate their findings. Each TR should have a focused topic that is developed logically along some clearly identified perspective. The major components of a TR are title, author information, date, keywords, informative abstract, body, acknowledgments, references, and appendices. Typically, the body is organized into four sections: motivation, methods, results, and discussion. This document offers advice and specifications for writing TRs.
Overview
Communicating results is a crucial aspect of doing research. Through such communication other people can learn about and benefit from the findings. Often such communication includes a written document known as a Technical Report (TR). The successful researcher must master this important written form.A TR should explain what you did, why you did it, what you discovered, and what is significant of your findings. The report should identify clearly what is novel about your work, and how it relates to prior knowledge. There should be a focused topic, and an attitude about this topic. The topic should be developed according to the attitude in a thorough, logical, and orderly fashion. Throughout, the author should be helpful to the reader.
The report should include the following components: descriptive title, author name and affiliation, date, informative abstract, list of keywords, body, acknowledgments, and list of references. Additional separate appendices, where appropriate, may also be included. The standard four-part outline for the body of a technical report is motivation, methods, results, and discussion.
There is no minimum or maximum length requirement--the length should be appropriate for what you have to say. Many TRs are about 10--20 pages long, but it is not uncommon for TRs to be significantly longer. Regardless of length, it is usually an effective strategy to explain in successive ``layers.'' For example, lengthy TRs often begin with a relatively short overview section for readers who wish an executive summary. Quality and conciseness, not quantity, will be rewarded.
This document aims to help students learn the basics of computer science technical reports. Although my advice is highly subjective, I hope the reader will benefit from issues raised, even if she disagrees with my particular point of view. Although technical writing is a crucial part of writing TRs, this document is not a tutorial in effective technical writing. Several sources of information about technical writing are listed in the references. The rest of this document describes the following important aspects of TRs: thesis, components, organization, delivery formats, special advice for experimental projects, common mistakes to avoid, additional advice, and other important communication forms.
The Thesis
Every TR should have a thesis--a topic together with an attitude about the topic. The attitude helps focus the subject and provide a framework along which the topic subject can be explored. For example, the topic might be partitioning algorithms for the geometric Steiner tree problem, and the attitude might be that Steele's theory of Euclidean functionals provides a powerful tool for analyzing the performance of such approximation algorithms. The introduction of each TR should clearly identify its thesis and an organizational plan for developing the thesis.Many researchers find it useful to think in terms of questions and answers. I recommend that you carry out and communicate your research by raising and answering focused questions. For example, you might ask ``What are the performance limits of polynomial-time approximation algorithms?'' or ``What does the theory of probabilistic proof checking say about such performance limits?''
The Components
A technical report should include each of the following items:- A logical, accurate, descriptive, and grammatically correct title. Please note: the title ``CMSC 441 Course Project'' is not descriptive.
Titles should be as short as possible, while still satisfying the foregoing criteria. Avoid cute titles that violate these criteria. I often like two-part titles because they provide short and long forms (e.g. ``Statistical Techniques for Cryptanalysis: An Experimental Study using Real and Simulated English''). I try to avoid titles that exceed 17 words.
- Author name and affiliation, and date. For example, your affiliation might be ``Department of Computer Science and Electrical Engineering, University of Maryland Baltimore County.'' You might also like to include the city and state of your affiliation, your email address, and a URL to your home page. UMBC students: Please note that there is no punctuation in your University name.
- An informative abstract of approximately 200 words. Make sure that your abstract is informative---your abstract should serve as a substitute for your paper. Briefly summarize your main findings. Concretely summarize; do not introduce. Immediately get to the point in the first sentence. Do not cite any references in the abstract, and do not begin the abstract with the weak, hackneyed, and boring phrase ``This paper ...''. The abstract should be informative yet understandable to most researchers in your general field. I like the abstract to fit on one title page, including the title, author name and affiliation, date, and list of keywords.
- A list of appropriate keywords. These keywords should identify the field of your report and its major topics. Choose keywords to be helpful to researchers in locating your work in document-retrieval systems. What words and phrases should someone use to find your report? Be specific, and use only standard phrases. Browse some computer science journal (e.g. Journal of Algorithms) to get a feel for what is an appropriate keyword and what is not. Computing Reviews publishes an annual classification system including keywords which many journals follow.
Many journals use three levels of keywords: general terms (e.g. cryptology), subject descriptors (e.g. differential cryptanalysis) recognizable to most researchers, and implicit terms--specific words or phrases that act as proper names (e.g. RSA Cryptosystem) which might not be recognizable to all readers.
- Body of technical report. Write a clear, informative, and thoughtful description and critique of what you did. Where appropriate, include carefully drawn graphs and diagrams. Be sure to motivate, present, and interpret your findings.
Focus on the scientific content of the project--your questions and answers. Identify and explain interesting and important phenomena. Emphasize what is new about your project. In addition, briefly comment on the engineering aspects of your work: what problems did you face, what decisions did you make, and what are the consequences of these decisions? Although it is crucial to explain your experimental procedures, be concise and do not bore your reader with lengthy descriptions of routine implementation concerns.
Pay attention to important transitional sentences, especially the first and last sentences of the report. There are three standard ways to begin the introduction: startling statement, dramatic incident, and quotation. I like to end each report with a powerful sentence that concisely summarizes the significance of the entire project.
- Acknowledgments. Acknowledge any help you received, including any use of computer equipment. Be specific.
- Complete and accurate list of references cited in the technical report. There are three reasons for citing works: to give credit where credit is due, to be helpful to the reader to identify useful related work, and to identify he context and background of your work. Adopt a bibliographic style used by some major refereed computer science journal (e.g. use the style for the \it Journal of the ACM\/).
I like to list and number references by alphabetical order of author name. When citing references in the body of the report, always explain why the reference is being cited. For example, do not cite previous work without critically explaining how it relates to your work. I like to mention the author name in the textual citation, followed by the corresponding reference number (e.g. ``In 1976, Diffie and Helman [14] proposed the concept of public-key cryptography.'').
- Appendices for supplemental information and for information that is too detailed or voluminous to fit into body the of the technical report. For example, if your project involves any computer programming, you should include a nicely documented and formatted listing of all source code you wrote.
Organization
Although you are free to organize your report in any way you see fit, I highly recommend that you organize the body of your report along the following standard outline for scientific papers:- motivation
- methods
- results
- discussion.
In thinking about organization, I find it helpful to separate logical organization from explicit numbered sectioning. For logical organization, I think in terms of hierarchies. Part of the organizational task is to embed the logical organization into numbered sections. For example, the logical introduction might include one or more numbered sections, depending on what needs to be said. A short report might begin with one section: 1. Introduction. A longer report might begin with a more elaborate logical introduction consisting of four numbered sections: 1. Introduction 2. Overview 3. Background 4. Previous work. As the report evolves you may wish to modify the organization.
In describing the purpose of your project, restrict yourself to scientific and engineering reasons; do not discuss reasons that are related only to school. Do not repeat sentences from the abstract ver batim.
In the conclusion, you should explain what it all means to you. If you discuss philosophy, do so in the discussion section.
Special Notes on Experimental Work
Be sure to explain your procedures, to present your results, and to interpret your results. Summarize your findings in meaningful ways, visualizing important data (e.g. in graphs) whenever possible.If you are experimentally measuring the running time of a computer program, test your program on many randomly chosen inputs of a variety of sizes, including large inputs. Since the behavior of your program might vary significantly among inputs of the same size, for each input size, try several inputs of that size and report the sample mean and standard deviation for that size; do not simply try one input per size.
Be sure to explain your procedures in sufficient detail so that other researchers can verify and replicate your findings.
Delivery Forms
I prefer to receive TRs on standard 8.5 x 11 inch paper, with exactly one staple in the upper-left corner, without any cover. Please hand in any source code or other appendices separately, not attached in any way to the main report. I prefer not to receive technical reports in binders, which simply add bulk.Print any source code on 8.5 x 11 inch paper with carefully inserted pagebreaks. If your listing comes out of the printer with the pages attached to each other, then burst the listing (i.e. separate the pages and arrange them like pages in a book) before handing in the listing.
In addition, I recommend that you make your report available on the WWW using your favorite hypertext language (e.g. html).
Evaluation
I evaluate each TR on the basis of its scientific merit, effective presentation, and appropriateness for assignment. I reward thorough analysis, originality, and insightfulness. Scientific merit includes correctness, significance, novelty, nontriviality, and completeness.I evaluate source code on the basis of its correctness, completeness, design, modularity, documentation, coding, user interface, and testing.
Common Mistakes to Avoid
Adhere carefully to the following guidelines:- In the introduction of your report, clearly identify a focused well-defined question. Answer this question in the rest of your report.
- Analyze and interpret your data, and discuss the significance and limitations of your findings. Do not simply report your data.
- Be sure that your technical report is complete in the sense that it has each of the following components: descriptive title, author name and affiliation, date, informative abstract, list of keywords, body, acknowledgments, and references.
- In your abstract, specifically and concretely state your findings; do not vaguely describe what you set out to do. Your abstract should summarize, not introduce. Do not begin your abstract with the hackneyed phrase ``This paper.''
Additional Advice
Start early and do not wait until the last moment. Expect system downtime and personal illness, especially the week before the project is due.I strongly recommend that you prepare your written report using a document preparation system. Such systems enable you to edit your document the numerous times required to create excellent prose. In addition, they will enable you to produce high-quality printed output. If you do not already know such a system, now is a good time to learn. I recommend the Latex system because it and its relative TEX produce high-quality results for mathematical typesetting, and Latex provides high-level document support (e.g. indexing and cross referencing). As for text editors, I recommend Gnu Emacs because it is powerful, extensible, customizable, and self-documenting.
For drawing graphs and doing statistical analysis of your data, I recommend the program xmgr, which runs on the SGI workstations.
Whenever working on a large project, you should save your notes and preliminary drafts. Many people find this material useful, and it will be helpful to you if you are ever challenged to show that the work is your own. In addition, you should keep a copy of the final report in case the original is lost.
Other Important Communication Forms
Other written forms of technical communication important to researchers are: grant proposal, white paper, extended abstract, journal article, research monograph, conference proceedings, cover letter, letter of recommendation, and job application letter. Important oral communication forms include: conference presentation, technical lecture, dog-and-pony show, telephone conversation, and job interview. These topics are beyond the scope of this document.References
- Miller, Casey, and Kate Swift, The Handbook of Nonsexist Writing, Harper and Row.
- Sherman, Alan T., ``How to solve and write up homework problems'' (January 29, 1991).
- Higham, Nicholas J., Handbook of Writing for the Mathematical Sciences, SIAM Press (1993).
- Dornan, Edward A.; and CHarles W. Dawe, The Brief English Handbook, Little, Brown and Company (1984).
- Letitia Baldrige's New Complete Guide to Executive Manners, Rawson Associates (NY, 1993).
- Strunk, William Jr.; and E. B. White, The Elements of Style, Macmillan (New York, 1972).
Alan T. Sherman, sherman@cs.umbc.edu Last modified: April 27, 1995
2008年4月2日 星期三
Vista作業系統使用Dev-C++的問題
step1. 工具>編譯器選項>目錄>二進位檔:加入路徑 C:\Dev-Cpp\libexec\gcc\mingw32\3.4.2
step2. 工具>編譯器選項>外部程式:在每一個執行檔前都加入完整路徑 C:\Dev-Cpp\bin\
大功告成,接下來就可以正常編譯.c檔囉
2008年1月2日 星期三
中毒
http://www.ck101.com/forums/redirect.php?tid=1179909&goto=lastpost
http://www.ck101.com/forums/viewthread.php?tid=561244&extra=page%3D1
2008年1月1日 星期二
利用單晶片微控制器 實現電梯控制系統新創意
新電子 2006 年 4 月號 241 期
文.余兆棠/葉遠呈/蕭仁理/楊明儒
為了改善傳統電梯在使用上的不便之處,本文使用一款單晶片微控制器做為電梯控制系統的控制中心,再配合周邊電路設計,來提升電梯控制系統的使用功能,使其具備更人性化、更方便的使用特性...
電梯是日常生活中非常便利的工具,但是仍存在著一些操作上的困擾,例如在電梯內不小心按錯樓層時卻不能取消,因而必須多停靠不必要的樓層,浪費時間與能源。另外,當電梯內已客滿,但其他樓層的電梯使用者仍按下搭電梯按鈕時,同樣也會造成不必要的樓層停靠,以及時間與能源的浪費。針對這些問題,本文提出一些新的構想,以改善現有之電梯控制系統,並新增功能,如連按兩次電梯內控制按鍵即可取消按錯樓層的指令;電梯可自動判斷客滿,並將客滿資訊顯示於各樓層電梯搭乘處,讓各樓層使用者可清楚掌握電梯承載狀況;以及當電梯客滿時,若內部無人選擇之樓層,控制系統可跳過該樓層不停,即使該樓層外部有人欲搭乘電梯。
目前有極少數電梯已具備上述第一項功能。一般電梯皆裝有重量感測器來判斷是否超載,但未用來做電梯直達功能之控制。考量電梯的空間被占滿但未達到該電梯可負載重量之最高上限時,現有電梯控制系統無法判定為滿載,本文提出以影像辨識並配合電梯載重感測器達成「電梯滿載」之辨識,同時可將「客滿」資訊,顯示於各樓層電梯搭乘處,並應用此資訊,控制電梯直達之功能。
為落實這些電梯控制系統改良創意,本文以一款單晶片微控制器HT46R24做為電梯控制系統的控制中心,配合設計之周邊電路,實現一個可以執行上述新增功能的電梯控制系統,使得具備此控制系統的電梯,大幅提升其功能與方便性。
電梯控制系統設計
在此以專題製作方式實現前述電梯控制系統改良創意,電梯控制系統示意圖如圖1所示,圖2顯示相對應之系統方塊圖,其中電梯內部有按鍵與顯示、語音播放、影像擷取、載重偵測以及系統控制中心電路等模組,電梯外各樓層亦有按鍵與顯示模組。
本文採用的模組化設計,各模組與其功能分述如下:
電梯按鍵與顯示
本模組執行基本的電梯按鍵及顯示,電梯內部與外部按鍵採用4×4鍵盤掃描原理,而電梯內部樓層顯示裝置則採用8×8的光發二極體(LED)矩陣,外部顯示裝置則選用LED指示燈。電梯按鍵訊號送至系統控制電路處理,藉由系統控制中心判別樓層以及電梯上、下樓動作,同時傳送顯示訊號到顯示模組,顯示樓層與上、下樓之訊息。另外,若電梯客滿時電梯外各樓層會顯示「滿」的符號。
影像擷取與辨識
電梯內部設置CMOS影像擷取元件,系統控制中心驅動影像擷取,並以影像辨識配合載重偵測資訊判斷電梯是否客滿,當電梯客滿時,將客滿訊息傳送到電梯外部各樓層之顯示器顯示。
載重偵測
擷取電梯載重資訊,系統控制中心依此判定是否超載,並配合影像辨識判斷電梯是否客滿。
語音播放
本模組執行基本的語音播放功能,使用90秒分段即時錄放語音IC,預先錄製需要之語音,系統控制中心依電梯狀態,控制層樓與電梯的開關門等語音播放。
系統控制中心
採用單晶片微控制器作為主控晶片,撰寫程式控制所有周邊模組,實現電梯按鍵、上下樓動作、電梯樓層顯示,以及電梯語音等一般電梯所具備功能。此外也實現先前提出的新增創意功能。
電梯控制硬體設計
依據前述模組化設計,其電梯控制系統之硬體方塊圖如圖3所示,主控微控制器結合顯示控制、語音控制、辨識控制以驅動個別電路,另加上馬達、載重偵測、按鍵的控制以及影像監控系統。
其他所使用的硬體,還包括一款CMOS影像感測器、轉接板、模擬板(用以驅動轉接板)、SRAM記憶體,以及快閃記憶體。
電梯控制軟體設計
配合前述電梯控制系統硬體模組設計,設計相對應之控制軟體,使電梯控制系統可完成一般電梯所具備功能以及本文提出的新增創意功能,電梯控制系統之主控軟體流程如圖4所示,其中影像辨識配合載重偵測資訊判斷電梯是否客滿,是本文最重要之新增創意功能。其他電梯控制系統的一般控制軟體流程不在此討論。
本文之影像辨識是以電梯無承載之地板為參考影像,事先將電梯內無承載時的影像用非揮發性記憶體儲存起來,再將其讀取出來與電梯有承載的影像做比對,當比對結果與原來影像相差超過一定比例時判定電梯客滿,在此設定為75%,此數值在實際應用時可依實測資訊加以設定。當然做影像辨識判定客滿前先要以承載重量判定是否超級重。電梯是否客滿之判定流程如圖5所示。
可實現的電梯控制系統創意
實現並整合前一節所述之電梯控制系統軟、硬體設計,完成一個智慧型電梯控制系統之成品,圖6為電梯控制系統電路,包括控制中心、按鍵、顯示、語音等模組。圖7為影像擷取與辨識模組電路。
以CMOS影像感測器所拍下電梯無承載時地板影像,做為比對依據。圖8顯示以跳棋模擬承載電梯承載影像,並依據圖5的流程,判定電梯是否客滿。
本文主要提出電梯控制系統新增的按鍵取消、電梯自動判斷客滿以及客滿直達之功能,並以專題製作方式實現此創意,雖然現有之電梯門開關控制、停電後電梯重置、緊急對外聯絡電話、多組電梯架構等並未在本專題中一併實現,因為這些已是現有之功能,透過專題製作方式已足以說明這項創意確實可行。另外,本文採用影像處理方式實現「電梯客滿」判斷,其主要考量是電梯內裝設影像監控系統愈來愈普遍,因此可在不增加成本的情況加以實現。
(本文作者余兆堂為南台科技大學電子系教授,葉遠呈、蕭仁理、楊明儒就讀於南台科技大學電子系。)
(詳細圖表請見新電子241期4月號)
2007年12月29日 星期六


訂閱:
文章 (Atom)